M1 - Model Features
1.1 Identify Artefact, Element or System
If this is your first time working with this methodology, it is best to start from something simple, here we use the example of a pencil.

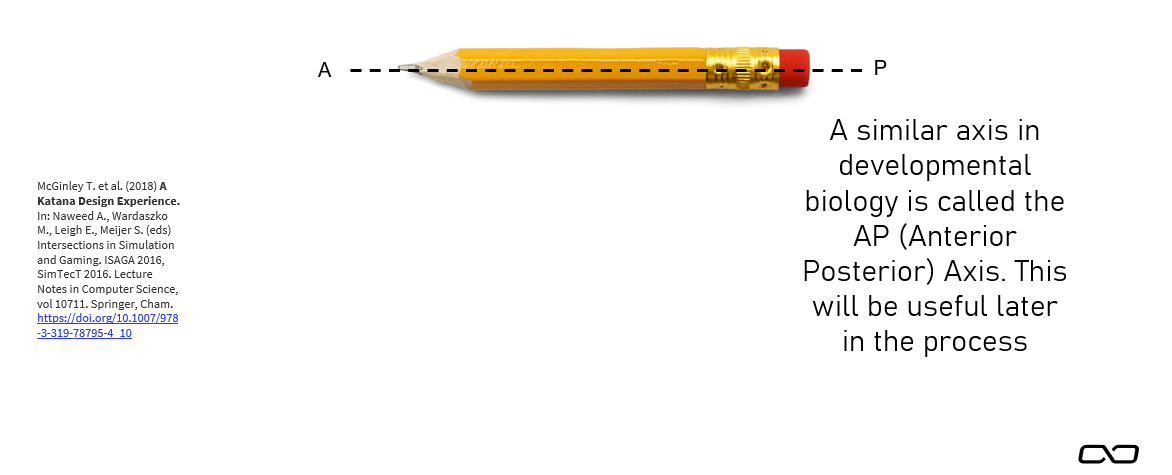
1.2 Check for Organising Line or Surface
Not all artefacts / systems will have a primary axis. In this case the axis is more important than the symmetry. The axis defines a front and back or an up and down. This will help us to understand the distribution of features along the artefact. In animals the HOX genes (a set of genes that express major features such as the head and torso, appear in the same sequence in DNA that they do in the axis of the animal). So in this exercise you are also starting to organise the genetic code of the artefact.
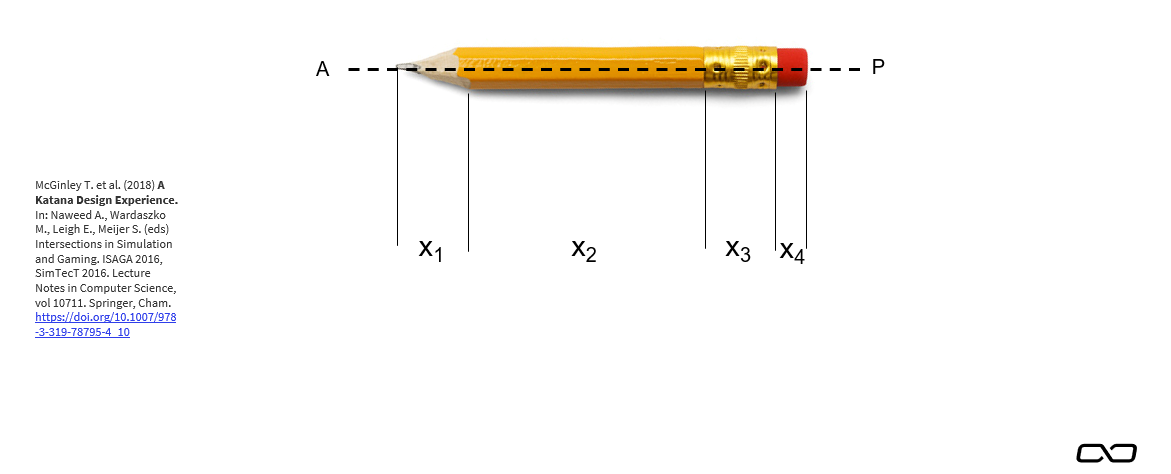
1.3 Identify Segments, Zones or Phases
Having defined the axis in the previous step, if the system exhibits symmetry you can divide it into segments along the axis, there may be some overlap between these segments. To start with you are observing segments that you can see from the outside. But in some instances we may need to include features that would only be visible if the artefact was transparent. Sidenote: I googled but couldn’t find an xray of a pencil…
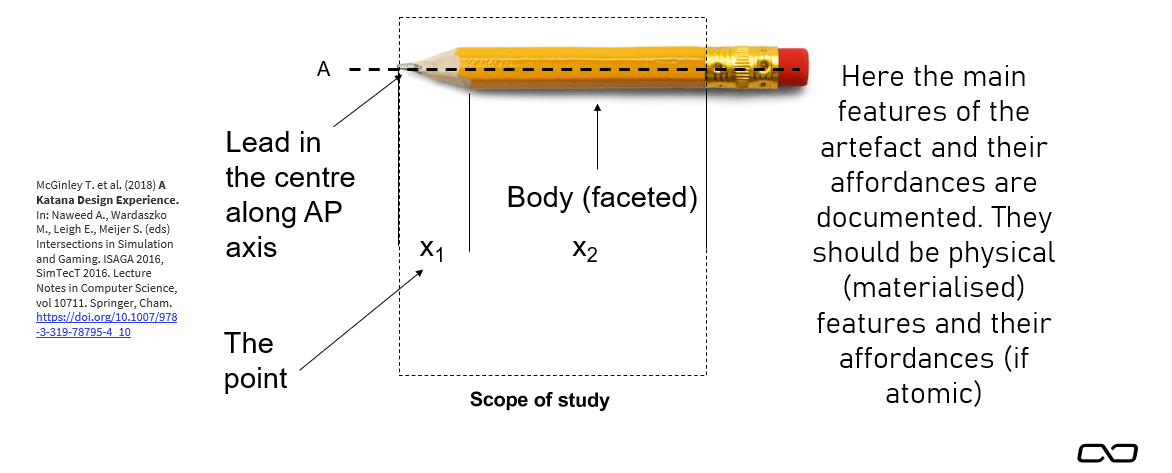
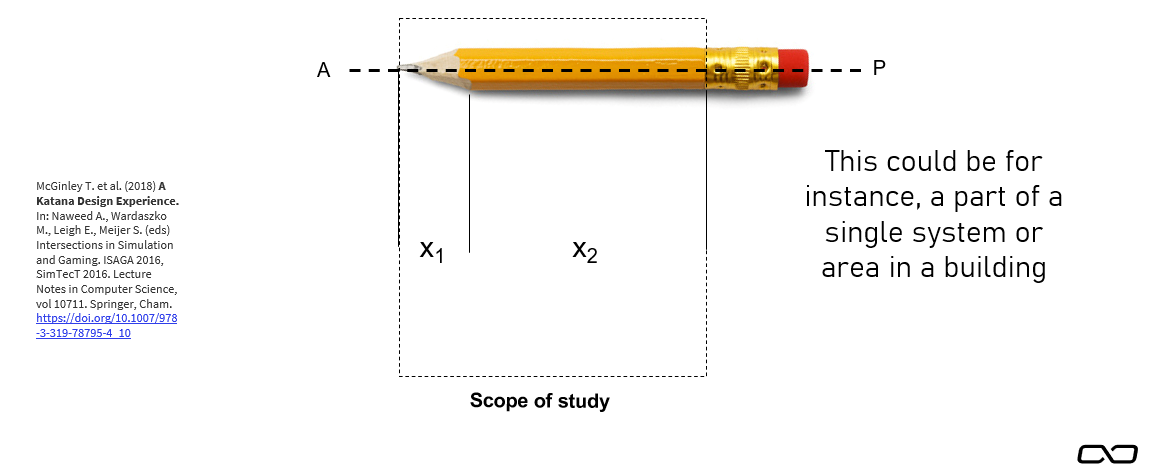
1.4 Scope Analysis
Some segments or zones may be more relevant to your analysis than others. It is a good idea to scope your analysis by reducing the number of segments you will study. It is recommended that the study area should be contiguous, if not, it might be better to make seperate studies for each contiguous area. The scoped area below of x1 and x2 is contiguous.
1.5 Identify Features
Having identified the organising line or surface, segments and scope(s) of your study. You can now start to identify specific features that are expressed for each segment.